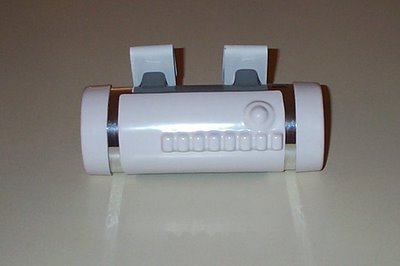
O2 Canister Clip
1 - Secure it well enough that groping children or fans in search of a piece of Star Wars to take home couldn't rip it off.
2 - Make sure that it would be perfectly centered EVERY time I put on my gear, no matter if I lost weight or gained it.
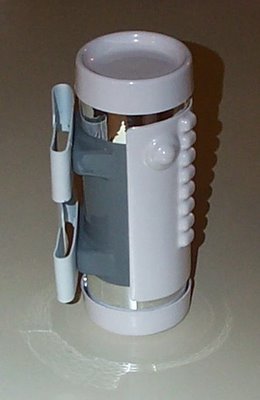
This mod will satisfy both criteria and give you a versatile canister that goes on solid, centered every time and comes off in 2 seconds if you decide to go without or go Sandtrooper.
I do not have production pictures to post, but show the finished product below, with a verbal walkthrough of the fabrication process.
I went to Lowe's and bought 2 strips of light gauge steel (make sure it is flexible enough for you to bend it without TOO much difficulty. Aluminum is too soft to be effective. You will also need 4 small flat-headed bolts and nuts.
First, I measured the width of my belt and doubled that length . . . this gave me the length for the metal strips.
Next, I took the measurement of my belt width and centered that on my strip . . . here's an example:
If my belt is 4 inches wide (meaning each strip will be 7 inches long) I marked a 3" wide portion in the middle of the strip . . . leaving 2 inches on one side and 2 inches on the other. What you will end up with is a strip with a 2 inch section, then a pencil line, then a 3 inch section, another pencil line, and a final 2 inch section.
Next, clamp a thin piece of wood or metal (about the thickness of your belt material) over the strip to a work table or bench along one of your pencil lines . . . with the remaining 2 inch section hanging out over the edge of the table. When this is secured, SLOWLY and carefully, bend the metal strip up into a 90 degree angle, and just BARELY begin to bend it over the top of the wood back toward the rest of the strip.
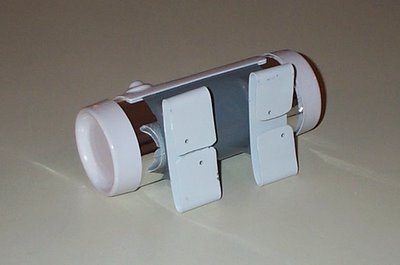
Repeat this for the other side, and you will end up with a strip of metal that has a 4 inch flat section on the bottom and has a narrow curve up into short little 1-3/4 inch "wings".
Then, I drilled 2 holes in the 3 inch portion of each strip AND through the FLAT portions of the rear of the canister (the part intended for belt mounting).
Once that was done, I took the small flat-headed bolts and fitted them through the strip, then the canister, securing it with the nut on the inside of the canister. Once both strips were secure and aligned properly, I dropped some hot glue over the nuts to secure them, or use lock nuts.
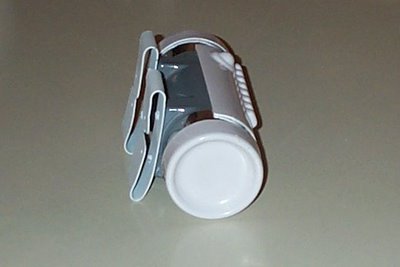
When the strips are securely attached to the canister, slowly bend the "wings" the rest of the way down, creating a 1/4 inch channel for your belt to pass through. Lightly sand the bolt heads as needed for a smooth slide.
posted by Shadow Walker at 7:39 AM
![]()


0 Comments:
Post a Comment
<< Home